How to Create Two-Day and Multi-Day Meetings in OnBoard
For meetings that span multiple days, OnBoard offers several ways to manage them effectively. Review the tips below to learn best practices for organizing multi-day meetings.
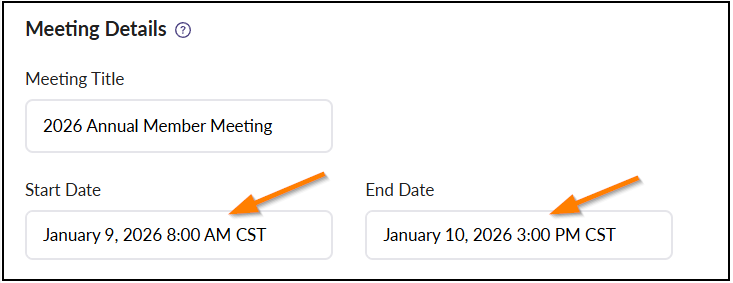
Schedule Meeting
Set the meeting’s start date and time, then choose the end date and time for the day and time when the meeting will finish.
Create Agenda
Select Agenda to build your agenda in OnBoard. Add all sections for each day, including scheduled breaks set at regular intervals, lunch periods, and end-of-day recesses.
Note, you can remove the numbering from any section, such as breaks and recesses. Click this link for more information on Unnumbered Agenda Sections.

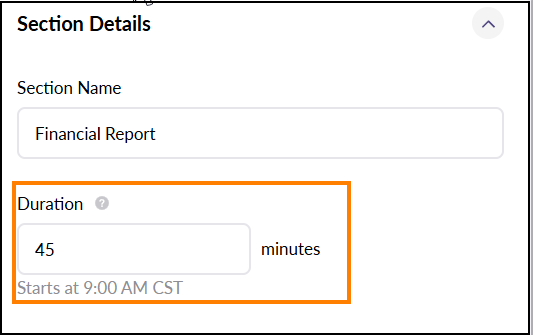
Assign Durations
Next, assign specific durations to each agenda section. Make sure to include the duration on all break periods as well.
Note: All durations will need to be in minutes.
Refer to the article Agenda Time Management: The Agenda Pacer Line for detailed instructions on using this tool.
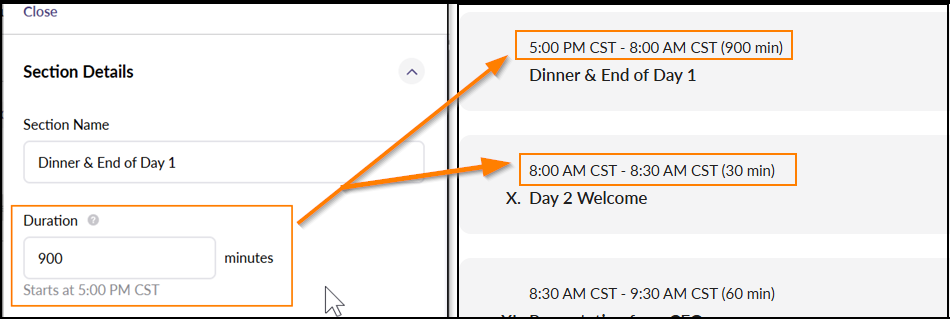
Set End-Of-Day Break
Set the end-of-day break duration so the first agenda item for the following day begins at the intended start time.
For example, If the meeting ends at 5:00 PM on day 1 and resumes at 8:00 AM on day 2, create an End of Day section with a duration to 900 minutes (15 hours).
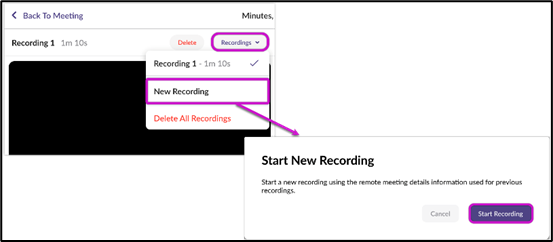
Note on Meeting Recordings
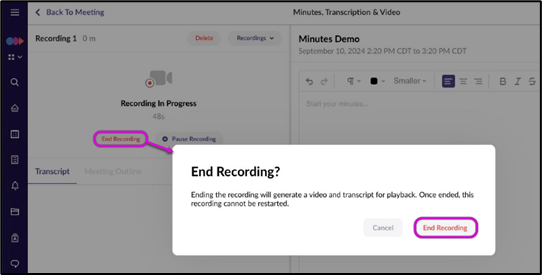
When using Minutes AI, use the same remote meeting link for all meeting sessions to ensure that all recordings are recorded to the same meeting.
For longer meetings using Minutes AI, like those lasting two days or more, periodically stop the recording throughout the meeting and start a new recording. For example, stop the recording during scheduled breaks and start a new recording when the meeting continues. Recording shorter videos enables OnBoard to generate transcripts and outlines more efficiently.
For additional information, please refer to the Minutes AI article.
Example Agenda
Here is an example agenda setup for a two-day meeting.

Comments
0 comments
Please sign in to leave a comment.